Saturday, March 23, 2013

Gluten Free Mini Carrot Zucchinni Muffins

These muffins are gluten free, my adapted version makes them nut free as well. if you know anyone sensitive to gluten and allergic to nuts, this is a great muffin!


This recipe is adapted from GDL's  Mini Carrot Zucchini Muffins  


Ingredients
1 Cup Brown Rice Flour

1 TB of Coconut flour ( yep, just 1 tablespoon- i will tell you why later)
1/4 Tsp of fine sea salt
1 Tsp baking powder
1/2 tsp baking soda
2 Tsp ground cinnamon
1/3 Cup grapeseed oil
1/3 cup of Maple syrup
1 Large egg at room temp
1/2 cup of grated carrots
1/2 cup of grated zucchinis 
1/2 cup raisins

an additional 1/3 Cup of Unsweetened applesauce

1/2 cup of water

2 TB of honey, optional,  for extra sweetness 

Frosting
1 Cup whipped cream cheese
1 1/2 TB honey 
Preheat oven to 350 degrees


When its Zucchini Season, ask for some from a neighbor , co worker or friend.
 

Pushing your dry ingredients through a sieve is really important, makes the batter less clumpy and more fluffy


I love the color of the maple syrup...this thing was the most expensive ingredient! I love that its such a great substitute for brown sugar.


**Instead of using all oil I did half oil and half applesauce. I measured this by using displacement, I put in the applesauce first in the measuring cup- about half way up- and filled the rest with the oil, then added an additional 1/3 cup of unsweetened applesauce and 1/2 cup of water- I did this because coconut flour is very very absorbent. I found this out the hard way once. Save your money and time and trust me on this.**


 The original recipe says to bake for 5 minutes, but i did more like 8 minutes, and since we are high altitude here in SLC, the temperature of the oven went up to 375 degrees.I think the oil and applesauce and the moisture from the veggies just needed the extra time.


the frosting is the best part! i could use this as a dip with apples and strawberries! i would swim in it if i knew how to swim ( yes, i do not know how to swim)


I made two batches, one to keep home and one to take to a bake sale at work. The ones for the bake sale, I baked in these cute start muffin cups and they were a hit at the bake sale! People love seeing the all natural ingredients, and I didn't realize how many gluten sensitive people are really out there, or people who just truly appreciate a healthful muffin!

Sunday, March 17, 2013

Tuesday, March 12, 2013

3 Generation Brownies


I've known these brownies since I was little. My grandma has always made them as well as my mom. My husband tasted them when we were first dating, 7 years ago, and fell in love with them. They are not light like your normal brownies, these babies are dense & chewy. The only difference between these brownies and the original recipe is the frosting. My mom always just bought chocolate frosting and I just can't do that. I decided on a really fudgey frosting for extra richness. So yum! You definitely get a sugar rush from these. 


Now I'm going to give you the recipe for the regular 9x13 dish, I half them sometimes because it's hard to finish a huge pan of brownies without feeling really bad. Haha. So if you have a mean conscience, like me, you can just half this recipe.


Ingredients:
2 C all purpose flour
1 tsp baking powder
1/2 tsp salt
4 unsweetened chocolate squares
2/3 C butter
2 C sugar
4 large eggs
2 tsp vanilla
1/2 C chopped walnuts (optional)
Preheat oven to 350° F.


Melt chocolate and butter together in microwaveable bowl, it's best to melt chocolate for 30 seconds first, add the butter for another minute. Mix sugar, eggs, and vanilla in large bowl for 3 minutes, or until light and fluffy. Add the chocolate and butter to wet ingredients, mix until just combined. Add dry ingredients. Grease a 9x13 pan with butter and dust with flour. I have found this to be the best way to get these brownies out after baking since they are so dense. Spread batter into pan and bake for 20-25 minutes. Once done let cool for 30 minutes and frost. Don't you worry, I'll give you my frosting recipe!


Chocolate Frosting
Ingredients: 
3 1/2 oz milk chocolate chips
3 oz semi sweet chocolate chips
2 C powdered sugar
1/4 C milk
1/4 C butter, softened
2 tsp vanilla
1/4 tsp salt
Melt chocolate in double boiler over stove, or in a glass bowl over boiling water. Stir the chocolate occasionally until melted and smooth. You could also put the chocolate in the microwave, checking every 30 seconds until fully melted. 
Pour the chocolate into mixing bowl of a mixer and add powdered sugar, milk, butter, vanilla, and salt. Beat until smooth, I used the whisk attachment this last time and it made the frosting slightly fluffier which I liked. You can use either attachment. Since this frosting is slightly warm I always let it sit for 30 minutes while the brownies are cooling. Once set, you have 2 options. The first option is what I do, I flip the brownies onto a platter and then frost them. Your second option would be to frost in the pan and cut as you want a piece. Either way they taste awesome! Top with nuts and enjoy!


Sunday, March 10, 2013

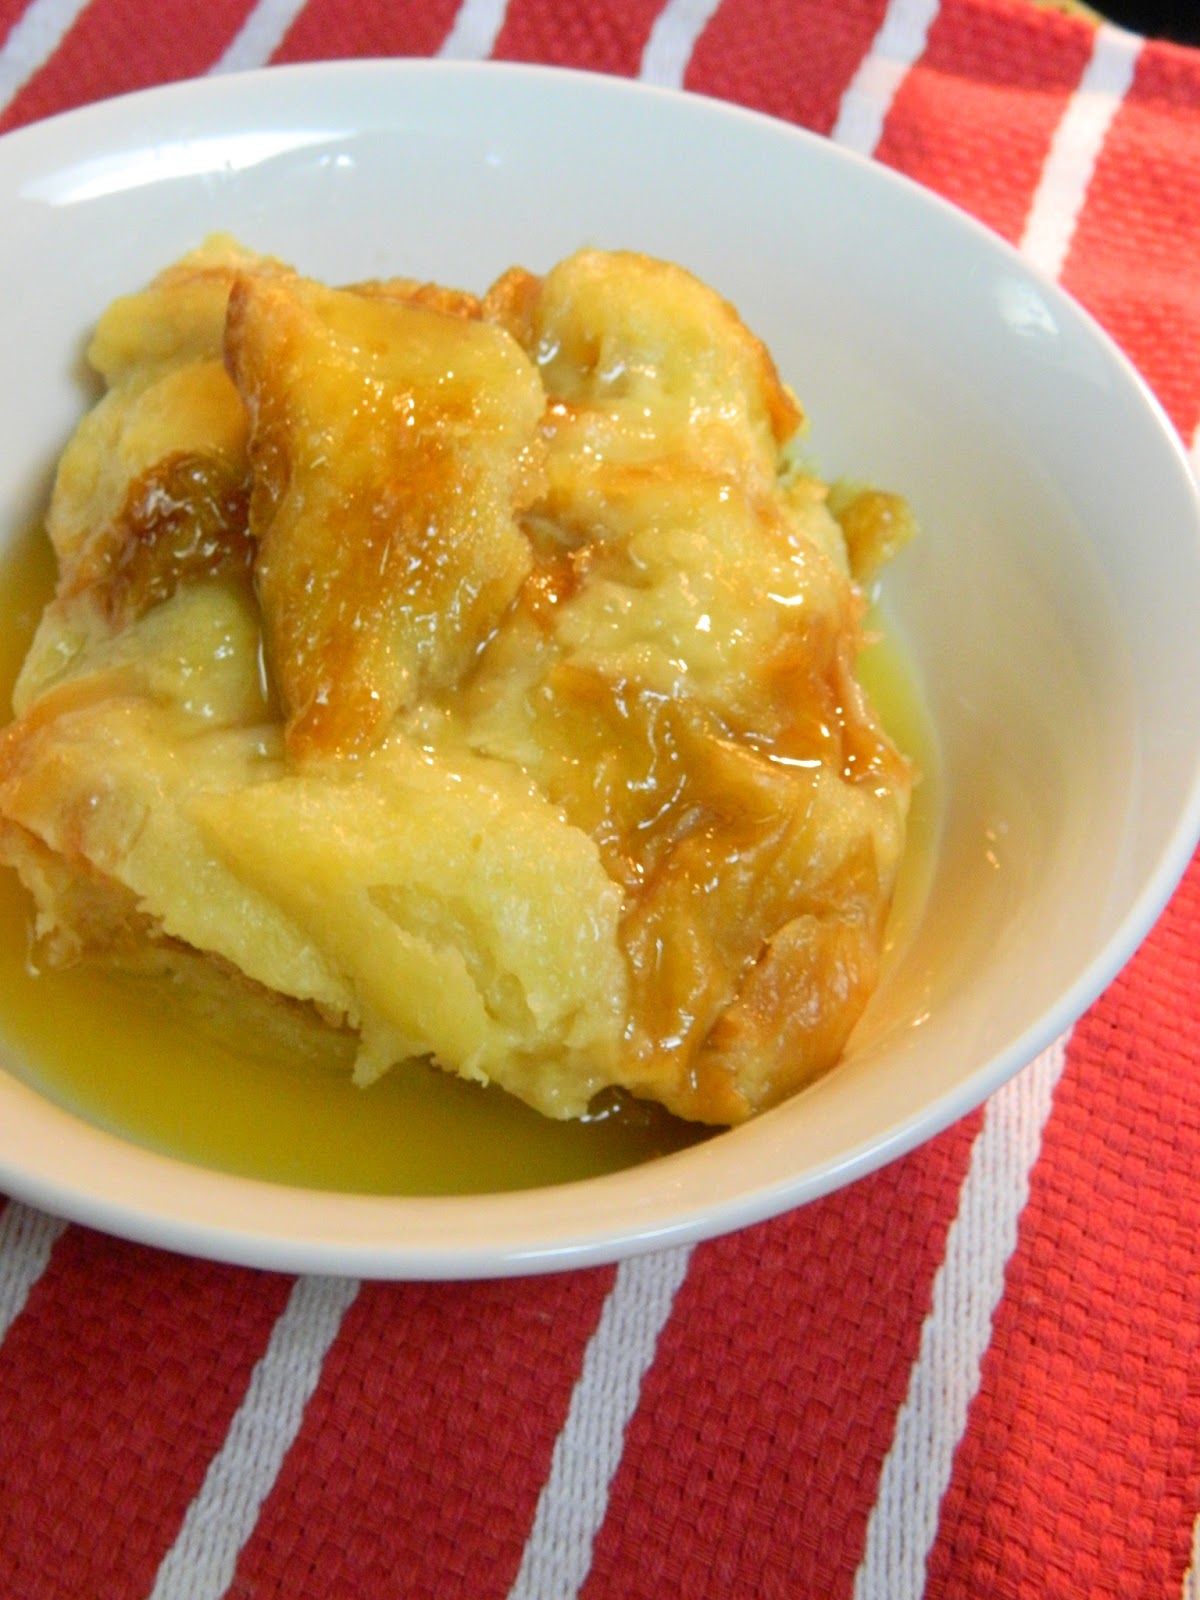
Grand America Hotel’s Bread Pudding Recipe

When I first tasted this dessert at The Grand for a work lunch, I was in heaven. I forgot what the conversation was about and could only think of how to recreate this amazing bread pudding. Luckily, Carrie, Director of Events, emailed me the recipe! EEEK! I couldn't wait to get baking! Well, actually, I could..I waited about 3 weeks. This is a no fail, delicious dessert. The rum sauce is what it's all about!

Okay, don't call your dietician after reading these ingredients. It's like a Paula Deen recipe on steroids.


Grand America Hotel’s Bread Pudding Recipe
Ingredients:
1 Cup Whole Eggs, Whisked
1 Cup Granulated Sugar
1 Cinnamon Stick
3 Cups Heavy Cream
1 Tbsp. Vanilla Extract
12-16 oz Croissants

Directions:
Preheat oven to 400 degrees.
In a medium bowl, whisk the eggs very well and set aside. Heat the cream with the sugar, cinnamon stick, and vanilla extract. Heat until hot, but not simmering. Whisk the eggs into the hot mixture, then strain and set aside. In a seperate bowl, break up the bread into small pieces. Pour the custard over the bread and mix very well. Let the bread soak in the custard for 10 minutes. Distribute into a 9x13 baking dish and cover with foil. Place the dish in a large pan filled with 1 inch of hot water. Bake for 60 minutes or until knife comes out clean.

Rum Sauce
Ingredients:
1 Cup  Granulated Sugar
2/3 Cup  Dark Brown Sugar
2/3 Cup Apple Juice
¾ Cup Heavy Cream
1 ½ Tbsp. Meyers Rum
1 Cup Unsalted Butter

Directions:
Place sugar, brown sugar, apple juice, heavy cream, and rum in a sauce pan, stir to combine. Bring to a boil and boil for 5 minutes. Remove from heat. With an immersion blender, blend in the butter. Continue blending the sauce about 4-5 minutes. Cool the sauce in an ice bath until reaching room temperature. Keep in refrigerator, covered until ready to serve.

What could taste bad with these ingredients?


For the eggs, I used large eggs, and it turned out to be 5 whole eggs whisked together to equal the cup.


The cinnamon and vanilla make the custard so warm and yummy tasting.

I didn't strain this custard, like the directions say. I just dumped it in, took out the cinnamon stick of course.

 I would lay on this pile of custard and croissants if I was a small person.Try not to break up the pieces to much when mixing, I did more of a folding method.

 I didn't blend the butter with an immersion blender, I just put two sticks in and heated up the mix and stirred until all the butter was melted. I am sure there is a reason for the blender, but 1) I don't have one and 2) melting and stirring was my next best choice. Also I used Bacardi Rum instead of Meyers- it was cheaper.


I split the batch up into 2 8x8 pans, one to take to a dinner party and one to leave home for Wes and I to devour late night. It took about 40 minutes for both to bake. Bake until a knife comes out clean.

OH MAN! Every bite was just as I remembered when I first tasted this.You will LOVE this recipe! Happy Baking!

Wednesday, March 6, 2013

Blackberry Cobbler


So first off please don't mind my terrible pictures. Nasty yellow light is of the devil but once night time hits and you are too lazy to pull out your external flash, you get over it. Besides it's the taste that counts, right? On to the cobbler!

This cobbler is so yummy and even better, it's so simple! I was watching The Pioneer Woman the other day, don't you just love her?!, and she was making this. I then realized I had blackberries, and butter was calling my name. She makes it in this beautiful ceramic dish that feeds 8 people but since it's just Zack and I, I decided to halve the recipe and pull out my oh so pretty ramekins. I love my ramekins, lately I've been baking quick desserts in them and everything turns out so good. They also tend to make me feel slightly better about eating sweets since they are 1 serving. Ha!

Like I was saying, the recipe is so simple. Here's Ree Drummond's original recipe http://thepioneerwoman.com/cooking/2007/08/the_great_cobbl/ in case you want to make a bigger batch, but I'll give you a quick rundown of my smaller version.

Ingredients:

1/2 stick butter
1/2 C sugar
1/2 C self rising flour
1/2 C milk
A couple blackberries per ramekin


Melt butter in microwavable dish. Mix together sugar, flour, and milk. Whisk in butter. Grease 2 ramekins and pour batter into each. Each ramekin turned out to have a 1/2 cup of batter in them. Perfection. Drop blackberries into batter filled dishes and sprinkle with sugar. 


Bake in the oven at 350° for 25 minutes. Check for doneness and let cool for 10 minutes. Top with whipped topping or ice cream and enjoy!